
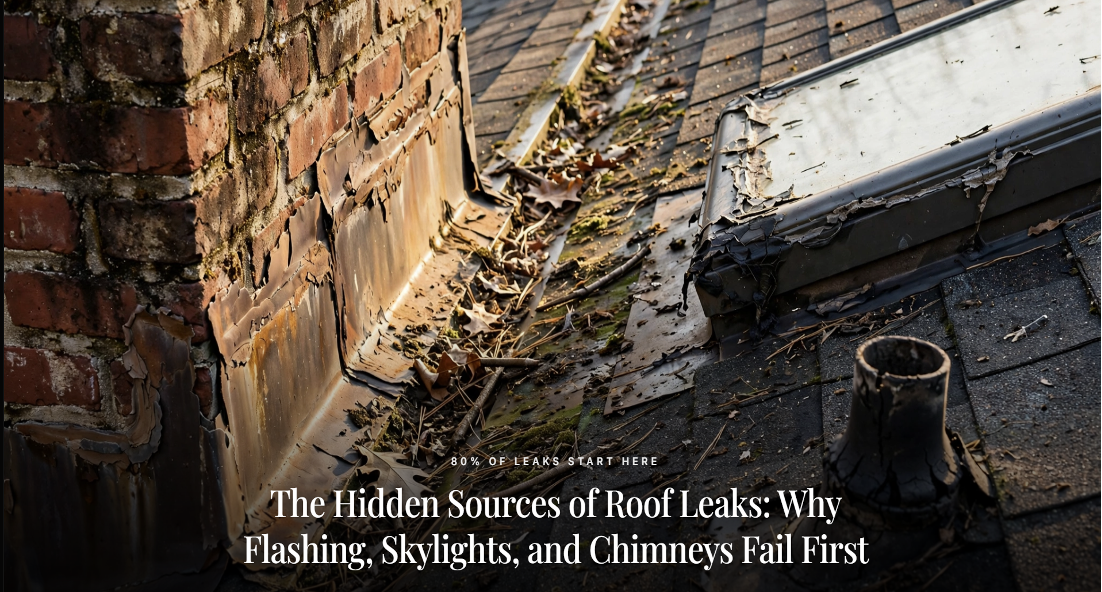
The Hidden Sources of Roof Leaks: Why Flashing, Skylights, and Chimneys Fail First
For many homeowners, the sound of a steady drip against a ceiling drywall panel during a seasonal rainstorm triggers an immediate sense of dread. The standard assumption is that the roof has reached the end of its functional lifespan or that a violent wind event has stripped away shingles or broken essential tiles. However, professional inspections frequently reveal a different reality. Most indoor ceiling leaks do not originate from the field materials themselves, but rather from the complex intersections where the roofing system meets a penetration or a vertical surface.
Bottom Line Up Front
Data from forensic roof inspections indicates that over 80 percent of residential roof leaks occur at penetrations, joints, and flashing transitions rather than within the field materials. While shingles and tiles provide the primary barrier against precipitation, the true vulnerability of a structure lies in the metal junctures and sealants designed to divert water around chimneys, skylights, and valleys.
The Anatomy of Vulnerability: Why Roof Penetrations Fail
The primary reason roof penetrations fail before the surrounding shingles is rooted in the physics of thermal expansion. A roof is a collection of dissimilar materials: wood framing, metal flashing, brick masonry, glass skylights, and asphalt or clay field materials. Each of these substances expands and contracts at different rates when exposed to solar radiation and temperature fluctuations.
As these materials shift, the sealants and mechanical fasteners holding them together are placed under constant localized stress. Water naturally flows into valleys and intersections, following the path of least resistance. When a transition point loses its integrity, it allows moisture to bypass the primary drainage plane. According to the National Roofing Contractors Association (NRCA) Residential Roofing Guidelines, proper design and installation of these transition points are critical because they bear the highest hydraulic load during heavy downpours. Without precise flashing, even a brand-new roof will fail at its most complex junctures.
The Top Three Weak Points on Residential Roofs
To understand why a roof fails, one must examine the specific components that bridge the gaps between the roof deck and external structures. These areas require meticulous detail and high-quality materials to remain watertight over decades.
Chimney Flashing Systems
The chimney is perhaps the most vulnerable point on any residential roof. It requires a multi-layered defense system to prevent water intrusion. This includes:
- Step Flashing: Individual L-shaped metal pieces woven into the shingle courses along the sides of the chimney.
- Counter-Flashing: Metal plates embedded into the mortar joints of the brick and folded down over the step flashing.
- Crickets: Small, peaked structures built behind wide chimneys to divert water away from the back wall.
- Mortar Joints: When mortar cracks due to age or settling, water can seep behind the metal flashing, rendering the entire system useless.
Skylight Seals and Curbs
Skylights offer aesthetic benefits but introduce significant risks. These units rely on rubber gaskets and raised curbs to keep moisture out. Over time, UV rays cause neoprene and rubber gaskets to dry out and lose their elasticity. Additionally, many skylights feature weep holes designed to allow internal condensation to escape. If these holes become clogged with debris, moisture can back up and appear as an active leak. Homeowners often mistake simple condensation or dried-out gaskets for a complete glass failure, when the issue is typically the perimeter seal or the curb height.
Plumbing Vent Boots and Roof Valleys
Plumbing vents are necessary for a home’s drainage system, but they require a “boot” or collar to seal the hole in the roof deck. These boots often feature a neoprene collar that fits tightly around the pipe. Constant exposure to UV rays causes this neoprene to crack and pull away from the pipe within seven to ten years, often long before the shingles fail. Similarly, roof valleys serve as the primary channels for water runoff. Following the Insurance Institute for Business & Home Safety (IBHS) Roof Leak Prevention Protocols, maintaining open valleys is essential, as debris buildup can cause water to “wick” or back up under the shingles, leading to significant structural damage.
How Water Travels: The Mystery of the Remote Leak
One of the most frustrating aspects of roof diagnostics is that the location of the interior drip rarely aligns with the exterior entry point. This phenomenon is caused by capillary action and surface tension. Water can enter at a high point, such as a chimney or a ridge vent, and then travel along the underside of a rafter for fifteen feet or more before finally dropping onto the ceiling insulation and drywall.
As Jonathan, owner of OC Roof Contractors, a licensed roofing contractor in Orange County, CA, explains, identifying transition leaks early prevents structural rot:
“When homeowners discover water dripping through a ceiling drywall seam, their first instinct is to assume a shingle blew off the roof. In over eighty percent of our service calls, the shingles themselves are completely intact. The water almost always enters through deteriorated valley flashing, cracked chimney counter-flashing, or a dried-out neoprene plumbing pipe boot. Transition joints take the brunt of heavy water runoff and thermal expansion. If you maintain and reseal these metal junctures, you can prevent thousands of dollars in hidden attic mold and plywood rot.”
Preventive Maintenance and Professional Diagnostics
Effective roof management requires more than a visual scan from the ground. Professional contractors utilize advanced tools to locate hidden moisture before it causes visible damage. Infrared thermal imaging is a common diagnostic tool: because wet insulation retains heat differently than dry insulation, a thermal camera can pinpoint exact leak paths that are invisible to the naked eye.
In cases where the source is elusive, water testing protocols are employed. This involves a systematic, bottom-up application of water to specific roof sections to replicate rainfall and observe where the penetration occurs. Homeowners should consult the Federal Emergency Management Agency (FEMA) Homeowner Roof Maintenance Guide for standard protocols on seasonal inspections, which recommend checking for loose flashing and debris at least twice a year.
Frequently Asked Questions
Is roofing cement a permanent fix for flashing leaks?
No. Roofing cement is a temporary patch that eventually cracks and pulls away due to thermal expansion. Proper repair requires the removal of the surrounding shingles and the replacement of the metal flashing components.
How long should a skylight last?
While the glass may last thirty years, the seals and flashing kits typically require professional attention or replacement every twelve to fifteen years to ensure continued water-tightness.
What is the first step when an active leak is discovered?
The priority is to contain the water inside the home to prevent floor and furniture damage. Once contained, an emergency tarping service may be required to protect the roof until a professional can perform a transition repair.
Summary Homeowner Roof Leak Prevention Checklist
To maximize the lifespan of a roofing system, perform the following inspections twice a year:
- Inspect Plumbing Boots: Check for any cracking or dry rot in the rubber collars surrounding vent pipes.
- Clear Valleys and Gutters: Remove leaves and pine needles that can cause water to back up under shingle edges.
- Examine Chimney Mortar: Look for visible cracks in the masonry or gaps where the metal counter-flashing meets the brick.
- Monitor Skylight Interior: Check for water stains on the interior light well, which may indicate a failing gasket or clogged weep holes.
- Check Attic Rafters: During or after a heavy rain, use a flashlight in the attic to look for wet spots or “tracking” marks along the wood framing.