Photo to Video AI Free: Giving Still Images a New Role in Creative Work
A product photograph can communicate shape, color, and texture in a single frame. A portrait can establish a personality. A landscape can suggest an entire story. Yet when those images become part of a video project, creators face another set of decisions: what should move, where should the camera go, and how should the scene unfold?
That is the practical appeal behind the search for “photo to video ai free.” Creators want to explore motion using images they already have, with an accessible way to test the results before committing a production budget.
For designers, independent sellers, and content creators, the opportunity begins with a simple question: what could this photograph become if it had a few seconds to tell its story?
From Choosing a Frame to Directing a Moment
Working with a still image means deciding what viewers see at once. Working with motion adds another dimension: when they notice something.
A gentle camera approach can draw attention toward a product. Small movements in fabric can make a fashion image feel less static. A restrained atmospheric effect can give an illustration a different mood without demanding a completely new composition.
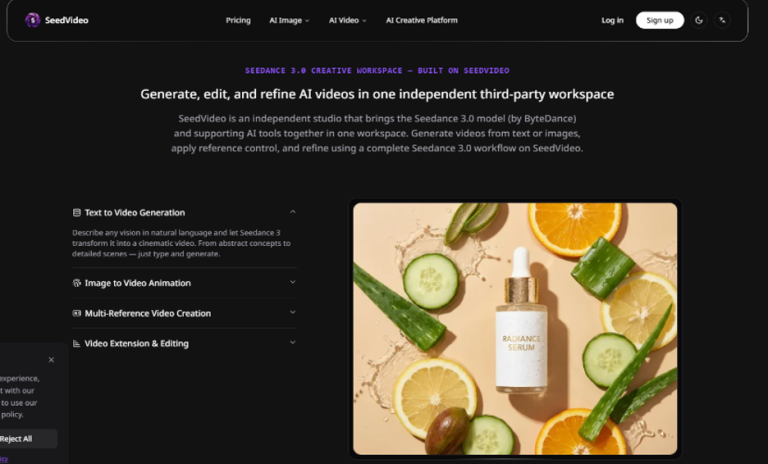
Photo to Video AI provides an image-to-video workflow built around an uploaded picture and an optional motion prompt. The image supplies the visual reference, while the prompt can describe how the subject, camera, or atmosphere should move.
This makes the initial creative task surprisingly familiar. The creator still chooses the subject, composition, and visual intention. The additional responsibility is deciding which movement strengthens the image.
A useful starting point is one deliberate action. If the photograph already communicates clearly, the animation only needs to give that message room to develop.
What “Free” Means for Photo to Video AI
Anyone exploring photo to video ai free should understand how the trial works before planning a project around it.
Photo to Video AI offers registration credits for getting started. An account and sign-in are required, and its homepage states that no credit card is needed for the initial trial. This is a credit-based introduction, so the available balance and the cost of the selected generation matter.
The interface lets users review the credit cost before generating. That gives the first experiment a useful boundary: choose an image, decide what to test, and check whether the selected settings fit the available credits.
The site also describes videos made with registration credits as watermarked evaluation outputs. Paid plans are presented as the route to watermark-free output and commercial use.
For someone evaluating the tool, the most useful question is therefore specific: can it produce the kind of movement this project needs? A focused trial can answer that more effectively than a series of unrelated experiments.
A Practical First Workflow
The homepage’s image-to-video process follows a straightforward sequence.
Start with a clear image. The site lists JPG, PNG, and WEBP as supported upload formats. Choose a photograph with a recognizable subject and enough detail to judge whether the generated movement preserves it.
Add motion direction if needed. The image-to-video form makes the prompt optional. You can supply instructions or leave it blank to let the selected model infer movement from the image.
For a product photograph, an example direction might be:
“The camera moves slowly closer to the bottle. The bottle stays still, with soft movement in the background light.”
This is a proposed creative instruction, not a guaranteed effect. Its value is that it describes a small, understandable change whose success can be assessed.
Review the available settings. The site offers multiple video models. Controls depend on the selected model, so duration, resolution, and aspect ratio should be checked in the interface rather than assumed to work identically across every option.
Generate, inspect, and download. The homepage describes downloading the result as an MP4 video. Before using it, watch the entire clip and check whether important details remain consistent.
The first attempt should establish a baseline. If something changes unexpectedly, simplify the motion and adjust one instruction before trying again.
Four Ways to Put Existing Images to Work
1. Explore Product Presentation
A seller with existing product photography can test how a subtle camera movement changes the presentation of an item.
Consider a ceramic cup photographed against a plain background. A restrained approach toward the cup could create an opening shot for a product video. The review should focus on the handle, rim, surface pattern, and proportions.
This is especially useful as a concept exercise: it helps reveal which photographs have potential for motion before a larger campaign takes shape.
2. Develop Social Content from a Photo Library
A collection of static images can become the starting material for separate video experiments. Each photograph can receive its own direction, allowing a creator to explore different moods across a series.
Choose the intended composition early. A subject positioned comfortably in a wide photograph may need a different crop for a vertical presentation. Where the selected model offers aspect ratio controls, use them with the destination in mind.
3. Add Atmosphere to Artwork
An illustration may benefit from movement concentrated in its surroundings: drifting particles, softly moving foliage, or a gradual camera approach.
These are possible prompt directions rather than promises of precise control. The creative challenge is choosing movement that supports the original artwork’s emphasis.
If the animation competes with the main subject, reduce the number of things happening at once.
4. Test Portrait Motion
A portrait offers a particularly clear test of consistency because viewers notice small changes in facial features.
Begin with a sharp image and restrained direction. Evaluate the eyes, mouth, face shape, and hair throughout the clip. An attractive opening frame is only part of the result; the transitions between frames also need to hold together.
For personal images, the best animation may be the quietest one.
How to Make a Free Trial More Useful
A limited credit balance encourages a more disciplined brief.
Before generating, write down the single question the test should answer. Does a camera approach suit this product? Can this portrait support gentle movement? Does atmospheric motion improve this illustration?
Keep the source image unchanged while refining one part of the prompt. That makes differences easier to interpret. Changing the image, model, and motion direction together may produce a different result, but it tells you less about why it changed.
Review the output against the purpose of the image. For a product, inspect recognizable details. For a portrait, inspect identity and expression. For artwork, inspect shapes and visual balance.
This approach turns a photo to video AI free trial into a small creative investigation with a clear outcome.
A More Intentional Use of Motion
The strongest reason to try photo-to-video generation is the possibility of discovering another use for an image that already works.
A still photograph may become a useful video opening. An illustration may support a short atmospheric sequence. A product image may reveal a promising direction for a future campaign.
Photo to Video AI gives creators a way to explore those possibilities through an uploaded image, optional instructions, model choices, and visible generation costs. The free-credit entry point makes the first evaluation accessible, while the result still needs thoughtful review.
Start with one image and one movement. Judge whether the motion helps the viewer notice what matters. That is a practical foundation for turning a free experiment into a repeatable creative workflow.