How To Turn A Logo Still Into A Printable Relief
Logo stills get approved flat, then someone asks for a relief the printer can build. Free & No sign up image to 3D is how that still becomes a mesh without redrawing the mark.
The risk is a stroke that looks sharp on the flat file and collapses once it has to stand up as a wall. A hairline that reads on screen can become a crumb in the hand.
The work is therefore a check on the approved lockup, not a new drawing. Keep the letterforms that already cleared the client. Change only the question: can this still hold a thickness a printer, or a title card, can use.
The Flat Mark Someone Already Approved
Invitation art and title cards usually die in the gap between a signed PDF and a request for “the same thing, but raised.” The PDF has the kerning, the hairline, and the color that took three rounds. A fresh 3D sketch would throw that approval away. The still is the asset. The mesh is a reading of it.
Two jobs hide inside that request, and they do not want the same output. A printable relief wants a white form with enough wall to survive a slicer. A title card wants the color of the lockup on a shape you can light. Mixing those jobs in one export is how a pretty front becomes a file the printer rejects.
Start from the file the client signed. If the only copy is a photograph of a printed card, that photograph is the input, not a reason to redraw. If you still have the flat artwork, export a clean still of it. Either way, the mark should enter as one image, with the strokes at the size you intend to judge.
Prepare The Still Before You Generate
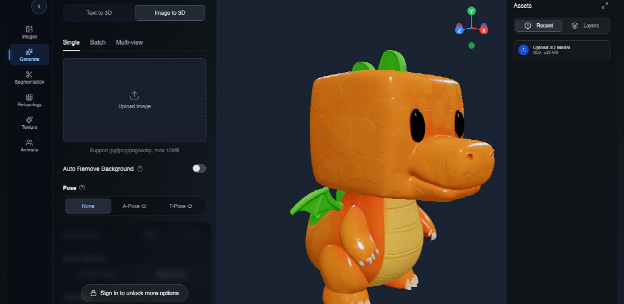
Image to 3D AI takes the still in the browser. The upload line reads jpg, jpeg, png, and webp, with a max of 10MB. A lockup exported from the layout file fits that cap easily. A photo of a card on a wooden table may not, once the table and the shadow are still in the frame. Crop to the mark before you upload, so the mesh is not asked to invent the table.
Clear The Background On The Upload
Auto Remove Background sits on the same form as the upload. Turn it on when the still is a photo of a printed piece, or when a colored field around the letters would otherwise become a slab. Leave it off when the field is part of the design, such as a solid invitation panel that should rise with the type. The wrong choice here is not subtle. You either get a floating mark, or you get a tile with type on it. Decide which object you meant before you generate.
After the file is in, the control reads Click to change image. Use that moment. If a drop shadow from the original layout is still attached to the letters, swap in a still without the shadow. A shadow that was a design effect on paper becomes a ramp in a mesh, and the ramp prints as a lump. Change the still before you generate, and that lump never enters the file.
Lock 1024 Or Step Up To 1536
Resolution is the other lock, and it is a real fork: 1024PX or 1536PX. The page tells you to generate at 1536 when you need production detail, and to drop to 1024 for a quick draft. Both run through the same pipeline, so you can rough the idea at the lower size and rerun the one you keep at the higher size. For a hairline monogram, do not treat 1024 as the file you send. Use it to see whether the mark has a body at all. If the strokes hold, rerun 1536 before anyone talks about a printer.
Pose can stay on None. A-Pose and T-Pose are for figures, and a wordmark is not a body. Public Visibility and Face Limit are on the form too. For a client lockup, do not leave a finished mark on a public setting just because the draft was casual. The draft can be disposable. The file with the client’s wordmark should not be.
Run The Three Moves In Order
The published path is three moves, and a logo still does not need a fourth invention. Image to 3D AI lines them up as upload, pick the output, then generate and read the viewer. The ticket on the job may literally say best free ai 3d model generator. Read that as a request for a trial on this still, and keep the mesh only if the strokes survive the spin.
- Upload the approved still, with the background decision already made.
- Pick White Model for a relief, or Standard Texture if the color has to stay on a title card.
- Generate, then spin the viewer and look at the thin strokes before you export anything.
White Model is the relief path. The page describes a white mesh for a printer, or for a surface you plan to texture yourself. Standard Texture is the path that keeps the still’s color on the form, which is what a title card wants when the letters should still look like the approved ink. Choosing texture for a relief, because the preview looks closer to the PDF, is the common miss. The printer does not need the photo’s lighting baked into a wall. It needs a form.
Model Selection is the control name on the panel: Standard Texture or White Model. Set it before you generate. Changing your mind after the fact is a new run, which is cheaper than sending the wrong kind of file downstream and calling it a tweak.
Read Thin Strokes Before Anyone Prints
Spin the viewer to the side, not only the front. The front will resemble the still, and that resemblance is not the test. The test is whether a hairline, a counter in a letter, or a gap between two strokes still exists as a wall you could pinch. If a counter fills in, or a hairline swells into the neighboring stroke, the mesh is wrong for a relief even when the front still looks like the logo.
A Stroke That Cannot Stand As A Wall
Reject the file when the thinnest stroke in the lockup cannot hold a thickness. A script flourish, a hyphen, or the crossbar of a light sans will fail this before a bold wordmark does. The failure is visible: the stroke blobs, breaks, or leans into the next letter. Do not send that mesh to a slicer and hope the nozzle sorts it out. Change the still. Thicken the stroke in the layout, export again, and rerun. That is design rework, and it belongs in the file the client already knows, not in a surprise on the printer bed.
A bold mark with even weight is the still that usually earns the second run at 1536. An ultra-light wordmark often should stay flat. The check takes one spin. If you cannot see daylight in the counters, stop.
Toggle Back To The White Model
If you generated a textured result for a title card, compare it with the white form before you call the color a success. The texture tool on the same workspace can repaint a mesh without touching the geometry: you describe the finish, or you give it a reference image, and the shape stays. Its page says a prompt can run up to 1,000 characters, and a reference image can be JPG, PNG, or WebP up to 10MB. PBR on means the material can react to light. PBR off is the flat color pass, which is the one to use when the next stop is a printer rather than a scene.
The viewer is supposed to let you toggle back to the white model and spin. Use that toggle as the comparison, not a thumbnail. If the color looks right and the stroke is still wrong, the color does not save the file. Fix the form. Paint is the second pass.
A Texture Pass That Leaves The Shape
A title card sometimes needs a second surface after the form is accepted: foil instead of ink, a paper texture, a dusk color the client named late. Regenerating from the still would risk a new silhouette. The texture pass is the one that claims to return the same mesh, with vertex count and outline left in place, and only the surface changed. That is the pass to use once the white model has already survived the stroke check.
Keep the reference honest. A swatch, a paint chip, or the client’s own product photo is a better guide than a paragraph of mood. The page is also plain about the limit of this tool: it paints the mesh you sent. It does not hand you a square tile you can wrap on some other object. If the job is a repeating background pattern, this is the wrong pass, and you should know that before the upload.
One look is not a materials library. Run a second prompt if the first finish fights the letterforms, then keep a single result. Six casual looks will not make a thin stroke thicker. They only change the coat on whatever shape you already accepted.
Hand The Printer A Closed STL
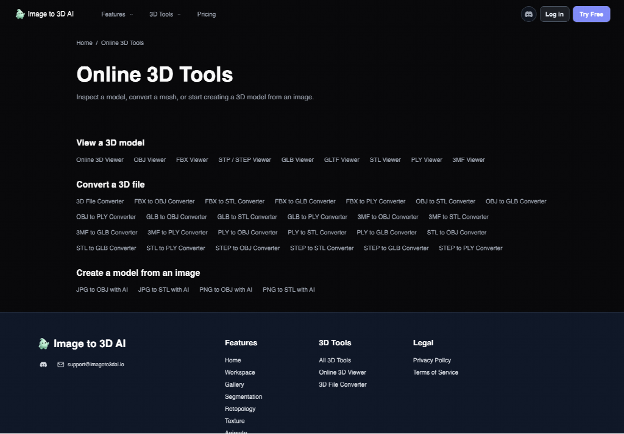
Models generate as GLB. The print download is STL. Image to 3D AI states that split directly, and a rigged model stays GLB, which a wordmark almost never needs. Ask for STL when the relief is the deliverable. Open it and look at the same counters you checked in the viewer. A mesh that was closed and readable in the browser can still arrive at the slicer with a wall too fine to stick. The viewer check reduces that surprise. It does not retire the slicer preview.
Judge the relief while it is on screen, then export STL when your plan includes downloads. Send that file, not a screenshot of the viewer. A screenshot cannot be sliced, and it will restart the argument about the hairline.
Name the file for the still it came from, including the resolution you actually ran. A 1024 draft and a 1536 keep should not share a name. The printer should be able to see which one you meant without opening both.
Who Should Run This On A Logo
Image to 3D AI fits a designer who already has an approved still and needs a relief or a title-card form without redrawing the mark. It is a poor match for an ultra-light wordmark whose strokes were never meant to stand, and for a pattern that needs a repeating tile instead of one mesh.
Run the still at 1024 only as a draft, lock White Model for the printer, and rerun 1536 when the counters still show daylight. Keep the texture pass for after the shape is accepted. The client already signed the flat mark. The mesh should be a thickness check on that signature, not a new logo.